|
First Data Input |
  
|
|
First Data Input |
|
By pressing button #1 on the Main Menu you will see the 'Data File Selection' window..
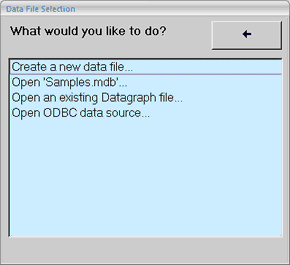
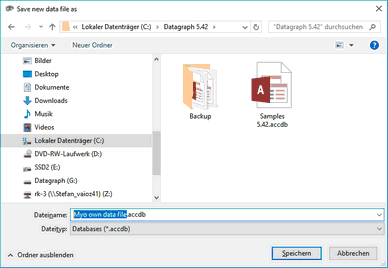
Select 'Create new data file...' and enter a suitable name like 'Lasik Data' or 'Dr. Miller Data' into the file select box
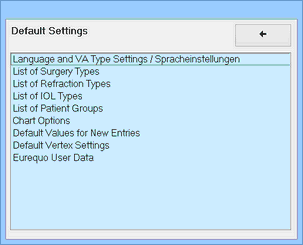
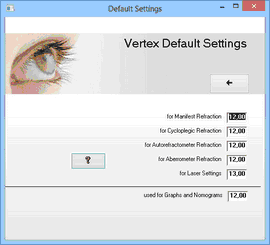
After the new data file has been created verify or change default settings such as vertex distances for example. New patient files will automatically be filled with these default values in order to speed up data entry.
Now click on Treatment and Follow Up Data (Button#2 on the main menu)
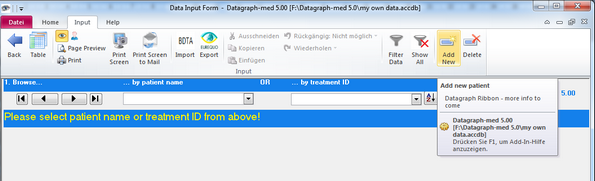
To file a new patient you either click on the 'add new' icon or select the '--- add new patient ---' line in the drop down list under '...by patient name'.
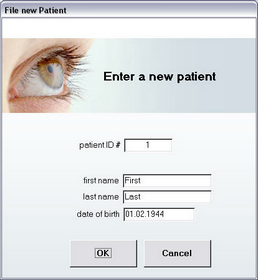
A sub form will appear and ask you to enter name and date of birth of the patient. A patient ID number will be suggested but you may also use your own existing numbering system. All Patient ID numbers must be unique however.
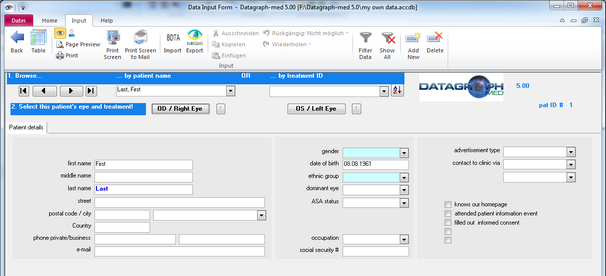
After clicking OK the actual data input form appears. Enter more patient data if available and then proceed entering data for OD or OS by clicking the appropriate button.
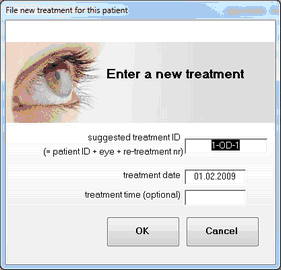
You will be asked whether you want to file a new treatment for this patient. Treatments are filed separately for each eye as well as for initial- and re-treatments. (The database is organized in the following way: Patients --> Eyes --> Treatments)
Keep suggested treatment ID or enter own unique patient ID number. Continue to enter treatment date (important) and treatment time (option).
Note: the last treatment date entered, will be memorized and taken as default for new entries until you change the treatment date manually.
Click OK to open the form and add follow up data. Drop down lists for visual acuity can be used. The VA type can be changed in default settings.
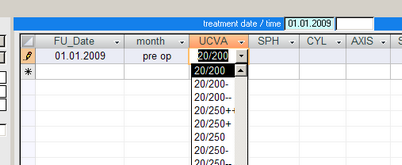
The first row automatically copies the treatment date as 'pre op' visit. You may change if needed. Any date prior to the surgery date will be used as 'preOp' visit.
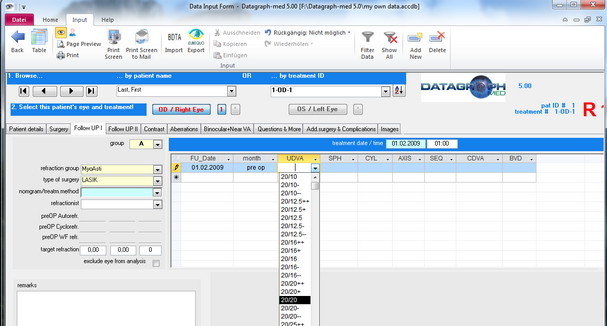
Continue using the 'tab key' to the next fields entering UCVA, sphere, cylinder and AXIS as well as BCVA for every preOP and follow up visit. UCVA and BCVA must be selected on the drop down lists. SPH, CYL and axis may be typed in directly. You may enter in plus or minus cyl setting.
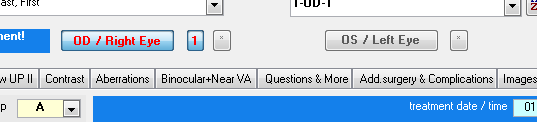
To enter the other eye's data click on the 'OS / Left Eye' button and proceed accordingly. The number next to the OS/OD buttons indicate the number of filed treatments. Every re-treatment is filed separately.
You then can continue to enter follow up data or add new patients and treatments by repeating from step one above.
The 'Back' arrow on the Ribbon bar brings you to the main menu.